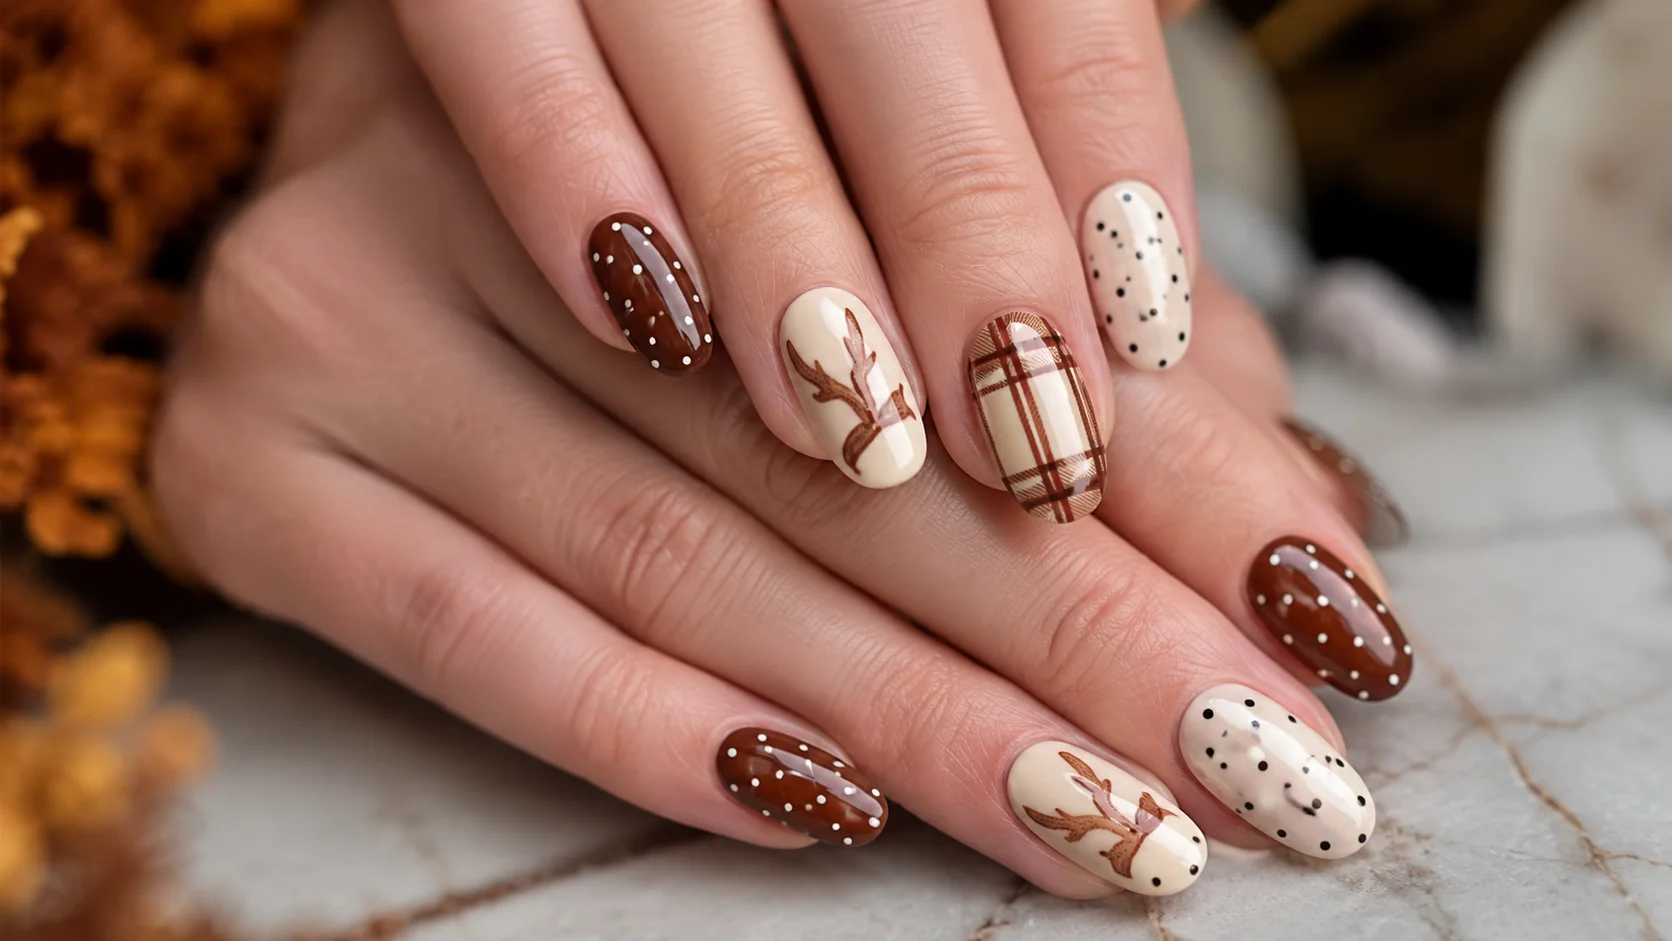
Until I used the little dot nails for the first time with almond polka-dot nails, I didn’t realize they could make a big difference. My hands were instantly transformed the next time I used one of the dotting tools.
The beauty of this trend is that’s what you see. It can be a classic pattern with a soft tapered shape, and it’s never boring.
I’ve worn many iterations of this look myself and many of my friends’ as well, on trusty hands! Here are 21 designs that I’ve added to my favourites list.
Before You Start
These are the 4 things that I always share with others before they attempt this trend at home.
- Shape your nails first: A clean, sharp almond shape will make the whole design look better, so file them first to get a tapered edge, then add the dots.
- Choose the right tool: A dotting tool will make the best, even dot; a bobby pin or toothpick can be used.
- Gel holds up longer: Regular polish can last a weekend, while gel can keep dots for two weeks or more.
- Never rush the dry time: Smudged dots are virtually always caused by applying the paint too quickly from one application to another.
Here is a quick comparison of the tools I reach for most.
| Tool | Precision | Cost | Best Price |
| Dotting tool | High | Low | Clean, even dots every time |
| Bobby pin | Medium | Free | Quick dots in a pinch |
| Toothpick | Medium | Free | Tiny, delicate dots |
| Nail art pen | High | Medium | Detailed lines and patterns |
Timeless Polka Dot Nail Classics
1. Classic Black and White Almond Nails
A clean white dot on a soft almond tip is a black gel polish base that will always look chic. Combines with any piece of clothing in the wardrobe.
This one would be ideal for beginners who want a single design that they can trust! I always let the black base set completely before adding the dots, or they’ll turn grayish.
My advice: Guess the spacing of the dots and fill in any spaces afterwards.
2. Nude and Gold Polka Dot Almond Nails
A soft nude base, embellished with a few gold foil dots, is an elegant and quiet choice. This is suitable not just in the office but also for weddings.
It’s the ideal design for those who wish for a subtle glimmer. For small gold dots, I use a toothpick rather than a large tool.
My trick: Only put the gold dots close to the edge, for a nice soft sparkle.
3. French Tip Almond Nails with Dot Accents
A simple yet elegant French tip with a subtle hint of white dots on a sheer pink foundation. A refresher of a well-known classic.
I believe this would be ideal for brides and old-fashioned nail fans. I just put dots on the accent nail, leaving the tip of the nail sticking out.
My secret tip: For a nice little dot, use a thin brush rather than a thick dotting tool.
4. Milky White Polka Dot Almond Nails
A soft, glass-like, white base with a few translucent dots to create texture. It’s light, soft and clean-looking.
It’s perfect for brides and the summer season. The dots are nearly overlaid white, so they aren’t particularly conspicuous.
My suggestion: Is to use a shiny top coat, which will stop the milky finish from chalking.
Bold and Colorful Dotted Nail Statements
5. Red and White Polka Dot Almond Nails
Cherry red base with white dots has a fun, vintage pin-up feel. It’s striking yet comfortable to wear.
This style is perfect for the summer season and dates. I add a few additional dots near the cuticle for a confetti effect.
My suggestion: The top coat should be glossy, as matte will dull down the red for me.
6. Neon Polka Dot Almond Nails
Neon polish with contrasting dots is loud in the right manner. It’s the kind of outfit you’d wear for a festival.
For large gatherings and those with a colorful personality, this is the one. I use a single shade for the neon and white dots, so it stays fun and NOT chaotic.
My advice: Often a second coat of neon is required, so take into account the additional dry time.
7. Pastel Rainbow Polka Dot Almond Nails
Five soft pastel colour tones (one for each nail) bound with the same dot. It plays like a kid but doesn’t come across as a baby.
The design is perfect for spring or individuals who wish to see color but don’t want it to be overly striking. I have all the dots the same size so that the ensemble doesn’t look unbalanced.
My trick: Use pastels from the same colour family to create a unified rainbow.
8. Ombre Polka Dot Almond Nails
If it is a soft gradient, it will receive a new set of dots close to the tip. Creating it appears difficult, but it’s not.
For those who love nail art, this is the one that would appeal to them as it is a small challenge. I allow the ombre to dry completely before adding dots, or the blend smears.
My advice: Using a makeup sponge will make blending gradients quicker than using a brush.
Soft and Minimal Dot Designs
9. Matte Nude Polka Dot Almond Nails
The matte nude base and softly-draped dots are a quiet luxury. It is a very good camera for photos and requires little effort.
The design suits the work environment and minimalists. The matte top coat goes last, even over the dots, to achieve an even matte finish.
My suggestion: Is to choose an “undercolor” (also known as “shade”) that is one tone darker than the base.
10. Chrome Silver Polka Dot Almond Nails
Chrome powder creates shiny dot variations that make for minuscule metalized buttons. It’s a little contemporary and futuristic.
This design is more suited to those who want to make a bold fashion statement and for night scenes. I put on the powder before the dots dry out, so that it is even.
My suggestion: Operate under bright lights, not under dark lights, or uneven areas would be missed.
11. Baby Blue Polka Dot Almond Nails
A soft baby-blue base with white dots is fresh yet a bit retro. Suitable for Spring and Summer.
This one is ideal for those who desire color but still want a calming effect. I make the dots small to retain the blue colour as the star.
Here’s my suggestion: Just put a single large dot on the ring finger to contrast.
12. Lavender Polka Dot Almond Nails
A “tonal” paint job uses a muted lavender base with lavender dots, and it looks soft and romantic. It is not only an efficient worker but also operates year-round.
It’s the perfect design for those who prefer soft and gentle colors. I have used a slightly darker shade of purple for the dots so I can still see them.
My advice: Use this in combination with a shiny top coat to achieve a dreamy look.
Seasonal and Holiday Dotted Almond Looks
13. Halloween Polka Dot Almond Nails
The dots are used twice – as spider eyes or as little pumpkins on a black or orange background. It remains spooky but retains its polka-dot essence.
Perfect for Halloween parties and the season for nail art enthusiasts. Using a fine liner brush, I carve out some spider legs from the dots.
My suggestion: Is to use just one nail, so the design isn’t too overcrowded.
14. Christmas Red and Green Polka Dot Almond Nails
The alternating red and green bases, punctuated by gold dots, look like miniature ornaments. There’s festive but no clip art.
This type of design is better suited to holiday parties, family get-togethers, and similar events. I changed the base color of every other nail to add some movement to the picture.
My suggestion: The gold dots look more elegant when used as a substitute for white dots.
15. Valentine’s Pink Polka Dot Almond Nails
The classic dots are used as a soft pink or hot pink base; one or two are replaced with small hearts. It doesn’t go overboard; it stays romantic.
For Valentine’s Day and date nights, this one’s for the best. I use the dotting tool to drag a line across my page to create a heart shape before it dries.
My suggestion: Make the hearts a darker shade of pink so they are more visible.
Trendy and Creative Statement Nails
16. Galaxy Polka Dot Almond Nails
A navy base is created with depth, white, silver, and purple dots that simulate the stars in a night sky. Dreamy and one-of-a-kind.
This is a great option for prom season or as a conversation starter. The sizes of the dots are changed intentionally, as real stars don’t match.
My suggestion: A little silver glitter polish on the dots to add a kind of shimmer.
17. Oversized Polka Dot Statement Almond Nails
In contrast to the small classic dots, large circles are used here instead, in a different color. It’s graphic, modern and stands out.
This one is perfect for those who can’t get enough small dots. I only put 2 or 3 large dots down per nail to keep it graphic, but not cluttered.
My suggestion: Is to stick to high-contrast colors, or the “oversized” dots don’t convey much.
18. Two-Tone Polka Dot Almond Nails
Dotted, seamed with a half in one color, half in another. It is contemporary but somewhat edgy.
This design is ideal for those who are fond of a split and graphic design. I don’t bother with the dot color so as not to compete with either half.
My recommendation: Line the two-tone edge with striping tape for a nice straight line.
19. Glitter Polka Dot Almond Nails
Dots of fine glitter polish are used, rather than flat color, for a solid base. It acts as a light trap with each of its movements.
If you’re looking to add some sparkle or make a statement for a holiday party, this is the one for you. Double-dot the glitter to get a good, even application.
My suggestion: Glitter dots should be coated with additional glaze to prevent them from becoming rough.
20. Cheetah and Polka Dot Combo Almond Nails
This style combines cheetah-print nails with traditional polka dots on other nails. Combines two trends into one set.
This one is perfect for those who love bold patterns and wish to get a variety. I have one or two cheetah-print nails on the heels or another part of the shoe to make it look more accent-like.
My suggestion: If you are painting the cheetah spots, use a fine-liner brush to keep them crisp.
21. Metallic Copper Polka Dot Almond Nails
The warm metallic copper base and darker dots are rich and edgy. This is an excellent fall flower.
This design would be ideal for anyone looking for a statement, warm metallic look. On the copper dots, use deep brown or black as opposed to the other colors.
My tip: Thin coats of copper polish are recommended to prevent streaking.
